centos安装h5ai目录列表
一直想给我自己的download.slogra.com下载站找个好点的程序,终于在最近发现了h5ai这个目录列表程序,简洁的外观,又不简单的功能,很适合我这样挑剔的人.好了,废话不多,下面来看看怎么安装h5ai吧.
系统:centos 6.x(64位)
环境:LNMP
1.安装lnmp
如果不会安装的,也不用看下面的了.
2.下载h5ai
wget https://release.larsjung.de/h5ai/h5ai-0.29.0.zip
3.安装h5ai
unzip h5ai-0.29.0.zip
mv _h5ai DOC_ROOT/_h5ai
#复制_h5ai到你的网站根目录下,如下:
DOC_ROOT
├─ _h5ai
├─ your files
└─ and folders
把文件放置到和h5ai平级目录就可以了.
vi /etc/php.ini
找到下面这一行:
disable_functions = passthru,exec,system,chroot,scandir,chgrp,chown,shell_exec,proc_open,proc_get_status,popen,ini_alter,ini_restore,dl,openlog,syslog,readlink,symlink,popepassthru,stream_socket_server
把exec,passthru,scandir这三个函数删除掉.
修改nginx配置文件:
vi /etc/nginx/conf/download.slogra.com.conf
server {
        listen  80;
        server_name download.slogra.com;
        root   DOC_ROOT/download.slogra.com;
        index  index.html index.php  /_h5ai/public/index.php;
        include nginx-extra.conf;

        location ~ .*\.(php|php5)?$ {
            fastcgi_pass   unix:/tmp/php-cgi.sock;
            fastcgi_index  index.php;
            include  fastcgi.conf;
        }

        location ~ .*\.(gif|jpg|jpeg|png|bmp|swf)$ {
            expires      30d;
            access_log   off;
        }

        location ~ .*\.(js|css)?$ {
            expires      1d;
            access_log   off;
        }
}
修改_h5ai/private/conf/options.json
/*使用中科大Google Fonts镜像,提高国内加载速度*/
"resources": {
        "scripts": [],
        "styles": [
            "//fonts.lug.ustc.edu.cn/css?family=Ubuntu:300,400,700%7CUbuntu+Mono:400,700"
        ]
  },
/*启用下载功能,并以zip为下载多文件时的压缩格式*/
"download": {
        "enabled": true,
        "type": "shell-zip",
        "packageName": null,
        "alwaysVisible": false
    },
/*允许显示文件信息及下载链接的二维码,但默认不显示,可在左侧栏开启*/
"info": {
        "enabled": true,
        "show": false,
        "qrcode": true,
        "qrFill": "#999",
        "qrBack": "#fff"
    },
/*以简体中文为默认语言*/
"l10n": {
        "enabled": true,
        "lang": "zh-cn",
        "useBrowserLang": false
    },
/*关闭视频及音频预览时的自动播放*/
"preview-aud": {
        "enabled": true,
        "autoplay": false,
        "types": ["aud"]
    },
"preview-vid": {
        "enabled": true,
        "autoplay": false,
        "types": ["vid-avi", "vid-flv", "vid-mkv", "vid-mov", "vid-mp4", "vid-mpg", "vid-webm"]
    },
/*不预览文本文件*/
"preview-txt": {
        "enabled": true,
        "styles": {
            "txt": 1,
            "txt-authors": 1,
            "txt-c": 3,
            "txt-cpp": 3,
            "txt-css": 3,
            "txt-diff": 1,
            "txt-go": 3,
            "txt-h": 3,
            "txt-hpp": 3,
            "txt-install": 1,
            "txt-js": 3,
            "txt-json": 3,
            "txt-less": 3,
            "txt-license": 1,
            "txt-log": 1,
            "txt-makefile": 1,
            "txt-md": 2,
            "txt-py": 3,
            "txt-rb": 3,
            "txt-readme": 1,
            "txt-rtf": 1,
            "txt-rust": 3,
            "txt-script": 3,
            "txt-xml": 1
        }
    },
/*启用搜索功能*/
"search": {
        "enabled": true,
        "advanced": true,
        "debounceTime": 300,
        "ignorecase": true
    },
/*允许以复选框选择多个文件*/
"select": {
        "enabled": true,
        "clickndrag": false,
        "checkboxes": true
    },
/*允许使用树状目录,并默认启用*/
"tree": {
        "enabled": true,
        "show": true,
        "maxSubfolders": 50,
        "naturalSort": true,
        "ignorecase": true
    }
配置h5ai访问密码
vi ./_h5ai/private/conf/options.json
找到这一行:
"passhash": "cf83e1357eefb8bdf1542850d66d8007d620e4050b5715dc83f4a921d36ce9ce47d0d13c5d85f2b0ff8318d2877eec2f63b931bd47417a81a538327af927da3e",
去http://md5hashing.net/hashing/sha512把你的密码转换为sha512格式.
当从h5ai显示支持界面进去后:
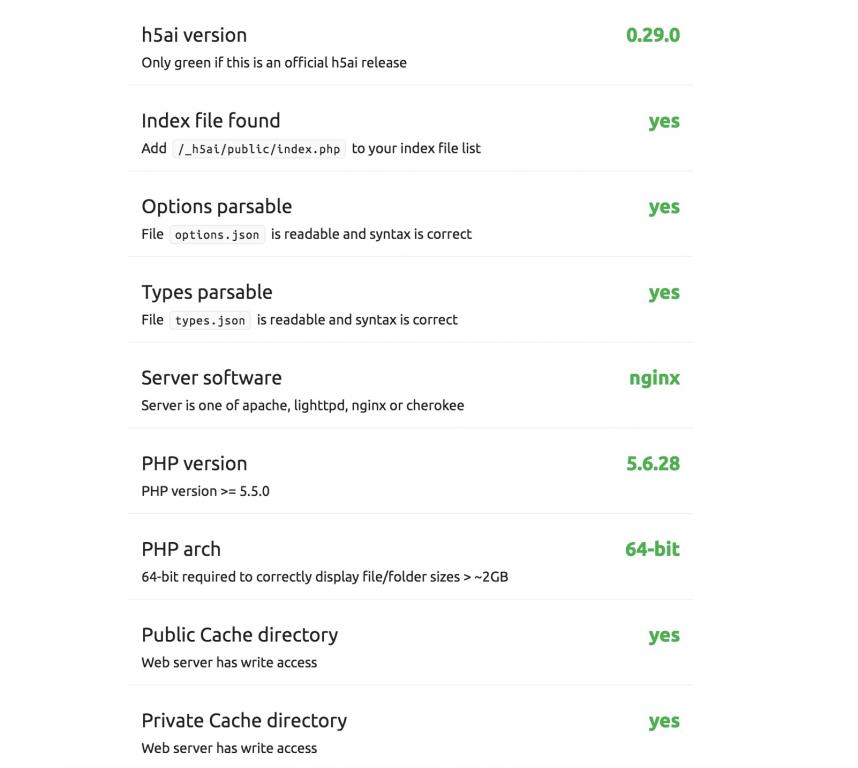
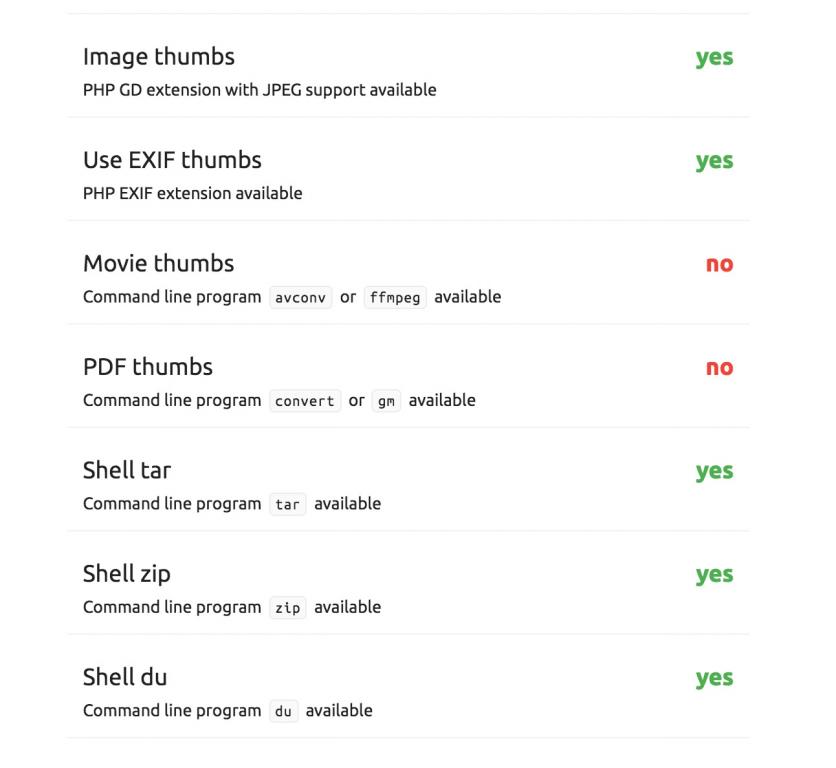
将上图显示no的选项变为yes,以便h5ai可以实现一些更丰富的功能
把_h5ai中private和public两个文件夹中的cache目录权限设置为666,刷新一下网页可以看到两个Public Cache directory和Private Cache directory的no变为yes.
#Use EXIF thumbs
安装php的exif模块即可.
#Movie thumbs
安装ffmpeg
#PDF thumbs
选择安装convert,直接yum -y install ImageMagick即可.
#Shell tar,Shell zip和Shell du
这三项根据h5ai官网,在php.ini被禁用函数中去掉exec和passthru即可,是否有危险不知道,自己掂量,禁用好像也不影响一些功能,另外顺便把scandir函数去掉禁用,不然会出现无非显示目录中文件的情况.
好了,最后就是访问浏览器进行验证.
ps:
https://www.5752.me/1555.html
http://blog.easydcode.com/129.html
ps:
https://www.5752.me/1555.html
http://blog.easydcode.com/129.html


centos7安装ffmpeg
yum -y install epel-release
rpm --import http://li.nux.ro/download/nux/RPM-GPG-KEY-nux.ro
rpm -Uvh http://li.nux.ro/download/nux/dextop/el7/x86_64/nux-dextop-release-0-1.el7.nux.noarch.rpm
yum -y install ffmpeg ffmpeg-devel
Movie thumbs
‘--conv’ or ‘ffmpeg’
这两个包怎么安装?
实在是没找着,